Hello, readers, if you’re a fan of press-on nails, you know they’re a fantastic alternative to salon manicures—easy to apply, budget-friendly, and available in endless designs. But did you know that many press-on nails are actually reusable? With the right care and storage, you can get multiple uses out of a single set, saving you both time and money. In today’s guide, I’m excited to share some practical tips on how to store and reuse your press-on nails so that you can keep them looking fresh and beautiful for future applications.

1. Why Reuse Press-On Nails?
One of the greatest advantages of press-on nails is that they’re not just a one-time deal. Many high-quality press-ons are designed to be reusable, allowing you to switch up your nail game without constantly purchasing new sets. Here are a few reasons why reusing your press-on nails is a great idea:
Saves Money
By reusing press-ons, you can get more value out of each set, making them an affordable beauty option over time. It’s especially beneficial if you invest in luxury press-on nails, where the cost is higher upfront.
Eco-Friendly Option
Reusing your press-ons also contributes to a more sustainable beauty routine by reducing waste. Fewer discarded sets mean less plastic waste, making this a great option for those who are environmentally conscious.
Convenience
If you find a set you love, it’s great to have it on hand and ready to go whenever you want to wear it again. Properly storing your press-ons means you can always have your favorite nails ready for any occasion.
2. Tips for Removing Press-On Nails for Reuse
To reuse press-on nails, it’s essential to remove them gently so you don’t damage the nails or the adhesive backing. Here are the best methods for removing press-ons with minimal wear and tear:
Method 1: Soak-Off Method
The soak-off method is gentle on both your natural nails and the press-ons, making it ideal for reusability.
Steps:
- Fill a Bowl with Warm Soapy Water: Add a few drops of mild soap to warm water in a small bowl.
- Soak Your Nails: Place your fingers in the water and soak them for 10-15 minutes to loosen the adhesive.
- Gently Lift the Nails: After soaking, use a wooden cuticle stick to gently lift the press-on nails, starting from the sides. Be gentle to avoid bending or cracking the press-ons.
- Remove Residual Glue: Use a cotton pad soaked in acetone-free nail polish remover to carefully remove any leftover glue on both your natural nails and the press-ons.
Method 2: Oil-Based Method
This method is perfect if you prefer not to soak your nails. An oil-based remover can help dissolve the adhesive while keeping the press-ons intact.
Steps:
- Apply Cuticle Oil or Coconut Oil: Apply oil around the edges of each nail, letting it seep under the press-on nails to loosen the adhesive.
- Gently Wiggle the Nails Off: Use a cuticle stick to gently lift and remove the nails, starting at the base.
- Clean Off Excess Oil and Glue: Wipe the press-ons and your nails clean with a soft cloth.
3. Cleaning Press-On Nails for Reuse
Once you’ve removed your press-on nails, it’s essential to clean them thoroughly before storing them. Proper cleaning ensures that any leftover adhesive or oils won’t interfere with future applications. Here’s a step-by-step guide to cleaning your press-ons:
Step 1: Remove Residual Glue
If there is glue residue on the back of your press-ons, use a nail buffer to gently buff it away. Ignore using too much pressure, as this can damage nails.
Step 2: Soak in Warm, Soapy Water
Soak your press-ons in a bowl of warm soapy water for 5-10 minutes. This helps to remove any remaining oils or adhesives.
Step 3: Rinse and Pat Dry
After soaking, rinse the nails thoroughly with clean water and pat them dry with a soft cloth. View and ensure that they are fully dry before ‘storing’ them.
Step 4: Sanitize (Optional)
For extra cleanliness, you can wipe each nail with an alcohol pad to disinfect them. This step is especially useful if you’re planning on reusing your press-ons multiple times.
4. How to Properly Store Press-On Nails for Reuse
Storing your press-on nails correctly is key to maintaining their shape and quality. With a few simple steps, you can ensure your nails are in pristine condition for their next use.
Use the Original Packaging
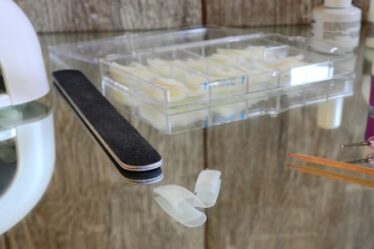
If your press-ons came in a sturdy box or tray, this is usually the best place to store them. The original packaging is often designed to keep each nail in place, preventing them from moving around and getting scratched.
Separate by Size
Organize your press-on nails by size to make future applications easier. Some sets come with more than ten nails, so keeping them organized can save you time when you’re ready to reapply.
Store in a Cool, Dry Place
Keep your press-ons in a cool, dry area away from direct sunlight, as heat and moisture can warp or damage the nails. Avoid placing them near a heat source or in humid areas like the bathroom.
Use Small Ziplock Bags or Pill Organizers
If you’ve lost the original packaging or want a compact storage solution, small ziplock bags or pill organizers can work well. Label each compartment with the corresponding nail size for easy identification.
Add a Silica Gel Packet
Placing a silica gel packet in your storage container can help keep moisture away from the nails, ensuring they stay dry and free from damage.
5. Reapplying Reusable Press-On Nails: Tips and Tricks
When it’s time to reapply your reusable press-on nails, there are a few tips and tricks to ensure they look fresh and last as long as possible.
Clean Your Natural Nails
Begin by cleaning your natural nails to eliminate any oils or residue. Buff the surface gently to create a smooth base for the adhesive to stick to.
Choose the Right Adhesive
Depending on your needs, you can use adhesive tabs for short-term wear or nail glue for longer-lasting results. Adhesive tabs are easier to remove and are gentler on the press-ons, while nail glue provides a stronger hold but may require careful removal.
Apply with Care
Line up each press-on with your natural nail, ensuring a snug fit at the cuticle. Press down firmly for at least 30 seconds to generate a secure bond.
Avoid Excessive Water Exposure
To extend the life of your press-ons after reapplying, try to avoid soaking your nails in water for long periods. Water can weaken the adhesive, leading to the nails lifting.
6. FAQs: Reusing and Storing Press-On Nails
Q: How many times can we reuse “press-on nails”?
A: With proper care and storage, press-on nails can be reused up to 2-3 times, depending on the quality of the nails and how carefully they are removed and reapplied.
Q: Can I reuse press-on nails with both adhesive tabs and nail glue?
A: Yes, you can use either adhesive tabs or nail glue for reapplication. Adhesive tabs are ideal for temporary use and can help extend the life of your nails if you plan to reuse them multiple times.
Q: Can I store press-on nails without cleaning them first?
A: It’s best to clean your press-ons before storing them, as leftover glue, oils, or residue can affect the quality of the nails and make them harder to reapply in the future.
Q: Do all press-on nails have the same durability for reuse?
A: No, the durability of press-on nails varies by brand and material. Luxury and high-quality press-ons are often more durable and designed for multiple uses compared to standard press-ons.
Conclusion: Making the Most of Your Press-On Nails
Press-on nails are a versatile and cost-effective beauty tool, and with the right care, you can make the most out of each set by reusing them. By following a few simple steps for removal, cleaning, and storage, your press-ons can look just as good on the second or even third wear as they did the first time. So, next time you pick up a beautiful set of press-on nails, remember these tips to keep them fresh, fabulous, and ready for any occasion.
Thanks for joining me on Preebeauty! Are there any press-on storage hacks or tips you swear by? Let me know in the comments below!


